
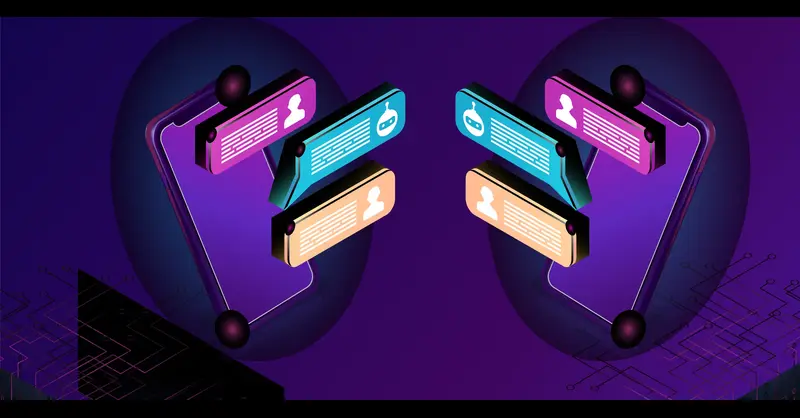
In my experience, instant messaging apps have become a core part of how people communicate today, and building one from scratch is both a challenging and rewarding process. In this guide, I walk you through how to build your own IM app using Apphitect in just 10 steps.
If you’ve ever felt limited by off the shelf in-app messaging tools and worried about data privacy, scalability or a lack of customization, you’re not alone. Businesses today need more than just a chatbox to engage and communicate with users. They need a secure messaging app that is flexible and offers a fully integrated communication solution to keep user engagement in control.
However, there are rising concerns like: Are these platforms truly secure? Can they seamlessly integrate with business systems? And more importantly, are they built to support unique workflows and customer engagement needs?
To address these concerns realistically, we suggest building your own solution.
You might think of it as a complex process, but it’s not as difficult as it seems. You can build an instant messaging app through simple, easy steps without wasting time or budget.
What Is an Instant Messaging App and Why Build Your Own?
An instant messaging app is a software application that allows people to exchange messages instantly over a real-time internet connection. It differs from traditional communication methods like SMS, email or social media messages, which are delivered with little to no delay and do not require an internet connection all the time.
Also, these self-hosted chat software solutions help you launch a fully branded, secure communication system with your own logo, without high costs, allowing users to stay connected anytime and from anywhere in the world.
Moreover, they serve as effective business communication tools by operating on central servers or decentralized systems. They also include features such as media sharing, contact syncing, online status and real-time data updates.
Top 5 Core Features to Include When You Build a Messaging App
By now, you must be convinced to build an instant messaging app. This section highlights the core features that you should look for or include in your team collaboration software.
1. Media sharing
Check if the messaging app you build is compatible enough to accommodate the sharing of images, files, voice messages and video clips seamlessly and effortlessly. You must be able to share with your users without any buffering or technical delays. This ensures effective communication, faster issue resolution and the efficient sharing of information with proper closure of queries within minutes.
2. Group chats, channels & thread support
Make sure that while creating your own messaging app, the system enables group chat, independent channel creation and thread support, making communication more seamless and effortless without the need to switch between tabs or apps.
3. Push notifications and presence indicators (online/offline)
While designing a chat solution for businesses, you need to include push notifications and online presence indicators to make conversations feel more natural and interactive for your users. thMore an just engaging with users, you should ensure that the app you build is customer-friendly and creates opportunities for meaningful and trustworthy conversations with control over availability.
4. Advanced features: reactions, message search, pinning, polls
Some additional features are always valuable, especially if you rely heavily on in-app messaging to communicate with your users. You can add emojis, reactions and message search to easily sort through old and new messages, as well as message pinning and polls, which can help reduce chat clutter while still allowing users to express feedback and emotions effectively.
5. End-to-end encryption and message security
Above all, a secure business messaging software should provide privacy, security and encrypted conversations that protect against unauthorized access, data breaches, hacking and interception, making it one of the strongest touchpoints for building trust with users.
How to Choose the Right Tech Stack for Messaging App Development
Important to get the fundamentals in place. No worries! we’ve got you covered.
From software components, libraries, programming languages and frameworks to tools and UI/UX design solutions, these suggestions will help you get started with ease.
Let’s s you’re wondering how to choose the right tech stack for mobile chat application development, it’s imay you are building a chat application for both Android and iPhone users. In that case, you might use two different tech stacks. You will also need two main software components: the client side and the server side. Here is the list of tech stack that rest assured your messaging app is built for potentially enhanced teams!
1. Frontend: React Native, Flutter, Swift, and Kotlin
Frontend development mainly focuses on client-side development with a graphical interface, allowing users to interact with the app’s UI, layout, buttons, animations, logic and other functionalities. For Android, developers primarily use Kotlin, while iOS development relies on Swift. For cross-platform compatibility, popular frameworks such as React Native, Flutter and Xamarin are ideally used.
2. Backend: Node.js, Go, Elixir — which handles real-time best?
Backed development is reasonable for real-time messaging. In that case, you need to make sure to pick a stack that manages user connections and delivers messages in real time. Node.js is great for moderate concurrency and fast development. GoExcels is best when you need high-performance messaging to scale to thousands of users. Elixir is ideal for massive concurrency and reliable, error-tolerant real-time communication.
3. Real-time protocols: WebSocket vs. WebRTC vs. XMPP
Following real-time protocols is another key aspect to focus on. This development strategy ensures that messages are delivered efficiently while providing the appropriate support based on the type of communication. For instance, WebSocket enables fast, persistent connections for text-based messaging. WebRTC is ideal for user-to-user audio, voice and video calls.
XMPP is a mature protocol that supports messaging, presence and extensibility for real-time communication.
4. Cloud infrastructure: AWS, GCP, or Azure for scalability
Choosing a cloud infrastructure is always crucial when building an encrypted messaging app. AWS, GCP or Azure ensure that your messaging app is scalable, reliable, secure and accessible globally. They also offer extensive support for storage, databases and real-time services.
How to Build an Instant Messaging App from Scratch: 10 Steps
- Step 1: Get SDK License Key
- Step 2: Integrate Chat SDK Into Android App
- Step 3: Initialize Chat SDK
- Step 4: Add My Application
- Step 5: Register User
- Step 6: Connect to the Chat Server
- Step 7: Observe Connection Events
- Step 8: Preparing user JID
- Step 9: Send a One-to-One Message
- Step 10: Receive a One-to-One Message
In general, there are 2 ways to build a messaging app. The first approach is to write codes line by line, all by yourself, or with an in-house dev team. This method is effective for large-scale enterprises that already have expert techies. The timeline of this approach stretches to a minimum of 6 months and may prolong up to 2 years.
The second approach is to use a pre-built instant messaging solution. This method works for any scale of business. All you need to do is integrate an SDK into your existing app, or build on top of the provider’s sample app. In this method, the deployment can be achieved as early as 20 mins to 48 hours.
We’d recommend the latter for the speed of deployment. In this section, we’ll explain how to build your own IM app using a pre-built SDK. We’ll use Apphitect for this sample project.
To get started, you will need the following:
- Android Lollipop 5.0 (API Level 21) or above
- Java 7 or higher
- Gradle 8.6.0 or higher
- Kotlin 2.0.20 or higher
- targetSdkVersion,compileSdk 35
Once you know you have all the requirements with you, begin the first step.
Step 1: Get SDK License Key
- Contact Apphitect’s sales team
- Discuss your requirements and get the dashboard access for your project
- Login to your account
- In the Overview page, check the Application Info section
- Note down your License Key
You will use this key to authenticate the SDK with the server.
Step 2: Integrate Chat SDK Into Android App
Go to Android Studio
Create a project or open your app’s project where you need to add instant messaging
Add the following code to your settings.gradle file (Gradle 6.8 or higher), or root build.gradle file (Gradle 6.7 or higher).
dependencyResolutionManagement {
    repositories {
        mavenCentral()
        google()
        jcenter()
        maven {
            url "https://repo.Apphitect.com/release"
        }
    }
}
In the app/build.gradle file, add the following code.
dependencies {
   implementation 'com.Apphitect.sdk:Apphitectsdk:7.13.32'
 }
To avoid library conflicts, add the below line to the gradle.properties file
android.enableJetifier=trueIn the AndroidManifest.xml file, add below permissions.
<uses-permission android:name="android.permission.INTERNET"/>Step 3: Initialize Chat SDK
For initialization, go to the onCreate() method in the Application class, and set the ChatManager to provide all the necessary information. Now proceed for the SDK initialization.
ChatManager.initializeSDK("LICENSE_KEY", (isSuccess, throwable, data) -> {
            if(isSuccess){
                Log.d("TAG", "initializeSDK success ");
            }else{
                Log.d("TAG", "initializeSDK failed with reason "+data.get("message"));
            }
        });Java
Step 4: Add My Application
Go to AndroidManifest.xml
Add your MyApplication file (your project name)
<?xml version="1.0" encoding="utf-8"?>
<manifest xmlns:android="http://schemas.android.com/apk/res/android"
    package="com.example.uikitapplication">

    <application
        android:name=".MyApplication"  // Add this line.
        android:icon="@mipmap/ic_launcher"
        android:label="@string/app_name"
        android:roundIcon="@mipmap/ic_launcher_round"
        android:theme="@style/AppTheme">
        <activity android:name=".MainActivity">
            <intent-filter>
                <action android:name="android.intent.action.MAIN" />
                ...
                <category android:name="android.intent.category.LAUNCHER" />
            </intent-filter>
        </activity>
    </application>
Step 5: Register User
You need to add a user in the Live Sandbox mode use the below code:
  FlyCore.registerUser(USER_IDENTIFIER, (isSuccess, throwable, data ) -> {
        if(isSuccess) {
            Boolean isNewUser = (Boolean) data.get("is_new_user"); // true - if the current user is different from the previous session's logged-in user, false - if the same user is logging in again
            String userJid = (String) data.get("userJid"); //Ex. 12345678@xmpp-preprod-sandbox.Apphitect.com (USER_IDENTIFIER+@+domain of the chat server)
            JSONObject responseObject = (JSONObject) data.get("data");
            String username = responseObject.getString("username");
        } else {
           // Register user failed print throwable to find the exception details.
        }
   });
Step 6: Connect to the Chat Server
After registering the user, the ChatSDK connects to the Chat Server automatically. As per the changes in the app’s lifecycle, the ChatSDK will proceed with the connection and disconnection.
Step 7: Observe Connection Events
Set the below CallBack method to receive the connection status through the ChatConnectionListener.
ChatManager.setConnectionListener(new ChatConnectionListener() {
    @Override
    public void onConnected() {
        // Write your success logic here to navigate Profile Page or
        // To Start your one-one chat with your friends
    }

    @Override
    public void onDisconnected() {
        // Connection disconnected
    }

    @Override
    public void onConnectionFailed(@NonNull FlyException e) {
        // Connection Not authorized or Unable to establish connection with server
    }

    @Override
    public void onReconnecting() {
        // Automatic reconnection enabled
    }
});
Step 8: Preparing user JID
The SDK identifies each user with a session ID. To assign unique ID for users, use the following code:
FlyUtils.getJid(USER_NAME)Step 9: Send a One-to-One Message
Use the below method to send a text message to other user
TextMessage textMessage = new TextMessage();
textMessage.setToId(TO_JID);
textMessage.setMessageText(TEXT);

FlyMessenger.sendTextMessage(textMessage, (isSuccess, error, chatMessage) -> {
    if (isSuccess) {
        // you will get the message sent success response
    }
});
Step 10: Receive a One-to-One Message
To enable the app to receive messages, you need to initialise the MessageEventsListener. This observes all the incoming messages that reach your app.
ChatEventsManager.setupMessageEventListener(new MessageEventsListener() {
            @Override
            public void onMessageReceived(@NotNull ChatMessage message) {
              //called when the new message is received
            }

        });
This listener will be called only when there is a new message.
@Override
    public void onMessageReceived(@NonNull ChatMessage message) {
        super.onMessageReceived(message);
        // received message object
    }
At this stage, you have a fully functional instant messaging app for your enterprise business. You can proceed to add more features by following the steps in official documentation.
Why Developers Choose Apphitect To Build Messaging Apps Faster
Building instant messaging into enterprise apps might seem simple, but doing it right still takes time, especially if you want to meet user expectations. When you don’t want to create this feature from scratch, just use Apphitect.
Apphitect is your pre-built CPaaS solution, ready to add thousands of messaging features and 500+ AI features. It handles the complete messaging infrastructure for your enterprise team communication apps.
Apphitect can quickly enable chat, channels, chat moderation, AI conversation summary and more. It can also manage media and sync calendars. It also supports hundreds of third-party tools like Gmail, or Slack so your teams can keep using features without juggling multiple apps.
Here’s how Apphitect can help you with adding instant messaging:
- Lets you customize features and set your own workflows
- Gives you full control over your data
- Allows adding security features you prefer (beyond built-in AES)
- Supports hosting on your own server
- Enables SIP/ VoIP features
- White-labels your app with your own logo, colors & brand elements
- Adds AI-powered messaging capabilities to your platform
Want to know how else Apphitect can help your IM project? Check Apphitect’s Enterprise Instant Messaging Software
How Much Does It Cost to Build a Messaging App?
Worried about huge expenses? Here’s the clarity you need about an IM app’s dev cost.
When you are building an instant messaging app completely from scratch, the cost may go more than $300000. Most importantly, this estimate does not include the cost of post-launch management.
But Apphitect’s instant messaging software is a product you can purchase for a custom pricing thatfits exactly with the budget you have in mind. Let the team know your requirements and the features your users will use. They’ll get back to you with a custom quote, without trapping you within rigid pricing packages.
However, if you feel you need a regular pay-as-you-go option, Apphitect has that as well.
Build, Connect & Collaborate Effortlessly with Apphitect!
Building an app from scratch might seem like a tedious process. But adapting pre-developed solutions like Apphitect into your business lets you unravel a more secure, white-label solution that allows you to own your data while still giving you options to switch between on-premises or cloud hosting.
Why beat around the bush when you can get your hands on CPaaS software like Apphitect? Get ready to scale with customization, flexibility and irresistible features, making your instant messaging app development easy, smart & effortless.
Wishing you a great step forward & all the best for your next level!🎉🏆
Hi, I'm Mohamed Asar, an enthusiastic live streaming expert. I love blogging and discussing the latest technological advancements trending in the market. I'm particularly curious to learn more about contemporary developments in educational streaming platforms and deliver them to audiences like you.