
With MirrorFly embedded SDK, you can add video calls and video conferencing to your website in six easy steps.
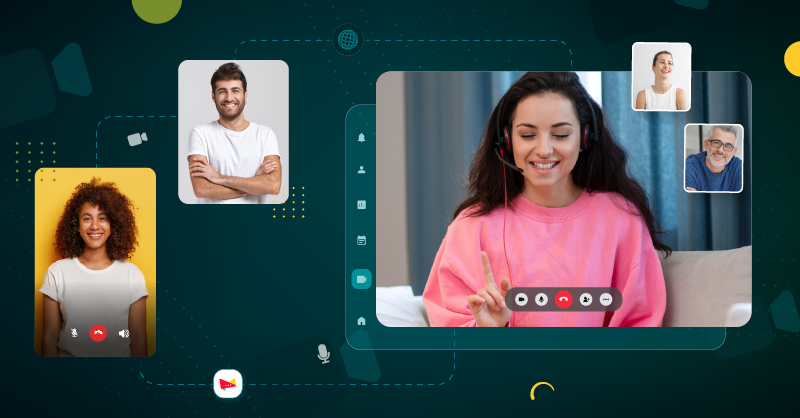
Video calls are a powerful feature for boosting engagement, offering customer support, delivering sales demos, and hosting meetings directly on your website or app.
In this guide, I’ll walk you through how to embed video conferencing to your website or application using MirrorFly’s video call API and SDK.
Add Video Conferencing to Your Website Using MirrorFly
Build an Embed Video Chat App: Step-by-Step Development Process
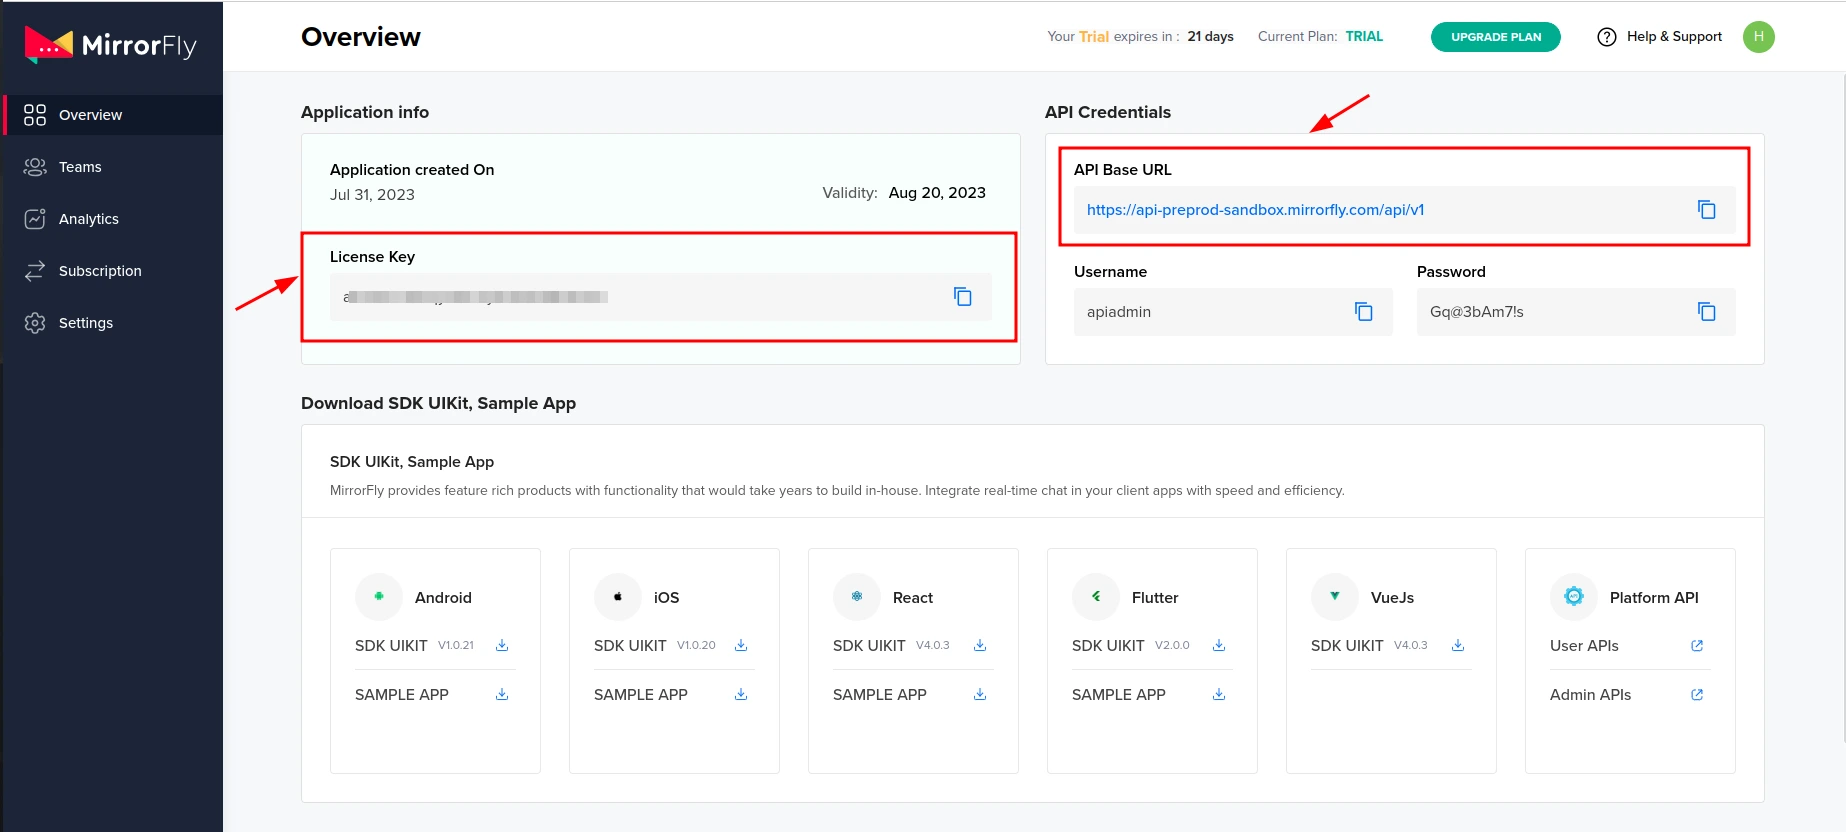
Step 1: Get the License Key
Step 2: Integrate the Call SDK
Step 3: Initialize the Call SDK
Step 4: Registration & Connection
Step 5: Initialize the Call SDK in the Application
Step 6: Managing Calls
Let’s learn how to integrate video calling API into your website or application in 6 easy steps using MirrorFly Video Call SDK.
Step 1: Get the License Key
- Reach out to the MirrorFly team and sign up for a user account.
- Log into your account.
- Go to the “Application Info” section to find your license key.
Step 2: Integrate the Call SDK
- Open an existing project or create a new one in Android Studio.
- Update Gradle.
- For Gradle 6.8 or higher, add the necessary code to your settings.gradle file.
dependencyResolutionManagement {
    repositories {
        jcenter()
        maven {
            url "https://repo.mirrorfly.com/release"
        }
    }
}- For Gradle 6.7 or lower, add the code to your root build.gradle file.
allprojects {
    repositories {
        jcenter()
        maven {
            url "https://repo.mirrorfly.com/release"
        }
    }
}- Add the required dependencies in the app/build.gradle file.
dependencies {
    implementation 'com.mirrorfly.sdk:mirrorflysdk:7.13.7'
 }
To avoid conflicts, add the specified line to your gradle.properties file.
android.enableJetifier=trueEnsure to include the necessary runtime permissions for calls. Click here for more information.
Step 3: Initialize the Call SDK
- In your Application class, inside the onCreate() method, initialize the SDK using the ChatManager to provide the required data.
ChatManager.initializeSDK("LICENSE_KEY", (isSuccess, throwable, data) -> {
            if(isSuccess){
                Log.d("TAG", "initializeSDK success ");
            }else{
                Log.d("TAG", "initializeSDK failed with reason "+data.get("message"));
            }
        });
Next, add MyApplication to the AndroidManifest.xml file.
<?xml version="1.0" encoding="utf-8"?>
<manifest xmlns:android="http://schemas.android.com/apk/res/android"
    package="com.example.uikitapplication">

    <application
        android:name=".MyApplication"  // Add this line.
        android:icon="@mipmap/ic_launcher"
        android:label="@string/app_name"
        android:roundIcon="@mipmap/ic_launcher_round"
        android:theme="@style/AppTheme">
        <activity android:name=".MainActivity">
            <intent-filter>
                <action android:name="android.intent.action.MAIN" />
                ...
                <category android:name="android.intent.category.LAUNCHER" />
            </intent-filter>
        </activity>
    </application>
Step 4: Registration & Connection
- Once the registration is successful, the ChatSDK automatically connects to the Chat Server and monitors changes in the application’s lifecycle.
FlyCore.registerUser(USER_IDENTIFIER, (isSuccess, throwable, data ) -> {
        if(isSuccess) {
            Boolean isNewUser = (Boolean) data.get("is_new_user");  // true - if the current user is different from the previous session's logged-in user, false - if the same user is logging in again
            String userJid = (String) data.get("userJid"); //Ex. 12345678@xmpp-preprod-sandbox.mirrorfly.com (USER_IDENTIFIER+@+domain of the chat server)
            JSONObject responseObject = (JSONObject) data.get("data");
            String username = responseObject.getString("username");
        } else {
           // Register user failed print throwable to find the exception details.
        }
   });
To track connection events and receive status updates, implement the ChatConnectionListener and handle the events in its callback method.
ChatManager.setConnectionListener(new ChatConnectionListener() {
    @Override
    public void onConnected() {
        // Write your success logic here to navigate Profile Page or
        // To Start your one-one chat with your friends
    }

    @Override
    public void onDisconnected() {
        // Connection disconnected
    }

    @Override
    public void onConnectionFailed(@NonNull FlyException e) {
        // Connection Not authorized or Unable to establish connection with server
    }

    @Override
    public void onReconnecting() {
        // Automatic reconnection enabled
    }
});
Step 5: Initialize the Call SDK in the Application
- In your Application class, inside the onCreate() method, add the initialization code for the Call SDK.
@Override
public void onCreate() {
super.onCreate();

//set your call activity
CallManager.setCallActivityClass(CALL_UI_ACTIVITY.class);
CallManager.setMissedCallListener((isOneToOneCall, userJid, groupId, callType, userList,CallMetaData[] callMetaDataArray) -> {
  //show missed call notification
});

CallManager.setCallHelper(new CallHelper() {
      @NonNull
      @Override
      public String getNotificationContent(@NonNull String callDirection,CallMetaData[] callMetaDataArray) {
          return CallNotificationHelper.getNotificationMessage();
      }

  });

CallManager.setCallNameHelper(new CallNameHelper() {
      @NonNull
      @Override
      public String getDisplayName(@NonNull String jid,CallMetaData[] callMetaDataArray) {
          return ContactManager.getDisplayName(jid);
      }
  });
}
Define the call activity in the AndroidManifest.xml file.
     <activity
            android:name="YOUR_CALL_ACTIVITY"
            android:configChanges="screenSize|smallestScreenSize|screenLayout|orientation"
            android:excludeFromRecents="true"
            android:launchMode="singleTask"
            android:resizeableActivity="false"
            android:screenOrientation="portrait"
            android:supportsPictureInPicture="true"
            android:showOnLockScreen="true"
            android:turnScreenOn="true"
            android:taskAffinity="call.video"
            tools:targetApi="o_mr1" />
In the onCreate() method of your call activity, invoke the required method to configure the call.
CallManager.configureCallActivity(ACTIVITY);In the onStart() method of your call activity, notify the SDK to remove the ongoing call notification.
CallManager.bindCallService();In the onStop() method of your call activity, notify the SDK to show the ongoing call notification.
CallManager.unbindCallService();Step 6: Managing Calls
- Generate a JID (Jabber ID): Use the provided method to generate a unique JID for a user.
FlyUtils.getJid(USER_NAME)- Make a Call: To initiate a one-to-one audio/video conferencing, use the appropriate SDK method for starting the call.
- Answer a Call: When receiving an incoming call, use the SDK method to answer the call, depending on the Android version and the state of the activity.
  CallManager.answerCall((isSuccess, flyException) -> {
            if(isSuccess){
                Log.d("AnswerCall","call answered success");
            }else{
                if(flyException!=null){
                    String errorMessage = flyException.getMessage();
                    Log.d("AnswerCall","Call answered failed with error: "+errorMessage);
                    //toast error message
                }
            }
});- Decline a Call: If the user decides to decline the call, call the SDK method to decline it and notify the caller.
CallManager.declineCall();Disconnect the Call: To disconnect a call, use the SDK method to end the call and notify the caller, either before the connection is established or after the conversation concludes.
CallManager.disconnectCall();5 Benefits Of Embedding Video Calls In Your Website
your users interact with each other and making everyday operations better.
Let me show you how these video conferencing features can impact the growth of your business.
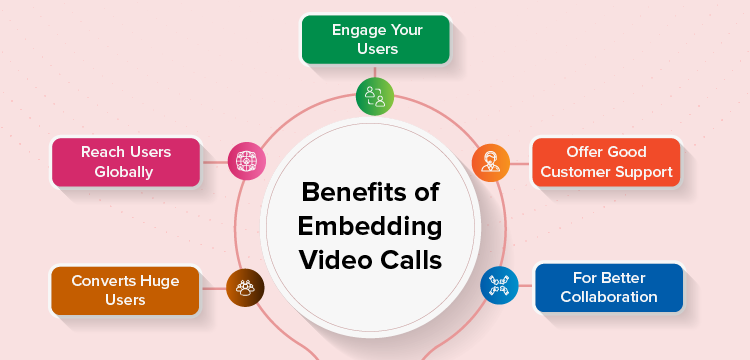
1. Engage Your Users
When you integrate video calls into your website or app, you can make your platform more engaging and connect your users seamlessly.
In an app that has video conference calls, users not only exchange information but also connect, see expressions, share smiles, and feel a human touch during connections.
2. Offer Good Customer Support
People look for customer support whenever they face issues with a product/service. They can easily seek help directly from agents and get visual assistance on any problem they face with your business.
In fact, people tend to trust and connect with your business if they have the opportunity to talk to a person and get help rather than just skim through guides and documents on your website. This is a great approach to retaining your customers for a very long time.
3. For Better Collaboration
Your entire business environment will change when you have a dedicated app, and people can make video calls in it. The workflow will be unique, making collaboration across internal teams, clients, vendors, and stakeholders smooth and secure.
Since your people need not juggle across apps, your team will be more focused and productive when compared to scenarios using third-party apps.
4. Reach Users Globally
Video conferences take your business beyond boundaries. Your team need not cross oceans to meet clients or customers in person to secure those big deals.
Rather, by integrating video calls into your website, you can reach newer markets and growth opportunities in just a few clicks.
5. Converts Huge Users
Customer retention is so important for a business. To achieve it, you can enable real-time interactions, live demos, and also offer instant support through video conferencing.
When your customers interact with a real person and get fast replies, they’ll feel more confident and trust the process, which makes them more likely to make a purchase.
Integrate Video Conferencing API & SDK into Any App & Web
In this article, I have outlined 6 simple steps to embed video calling functionality into your website or platform.
When building a business app with video chat functionality, a feature-rich solution like MirrorFly will help the complete development process.
You now know how valuable video conferencing is. You also know how beneficial it can be for your business. This is where MirrorFly changes your game.
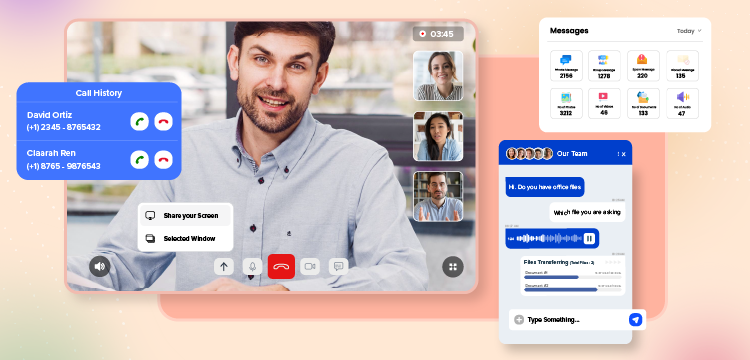
It is an incredible solution that developers choose to embed video conferencing into their website within a short period of time. And here’s some quick proof:
Key Features of MirrorFly White Label Video Chat
- Private and Group Calls
- Real-Time Messaging
- Web Conferencing
- Voice Broadcasting
- Call History & Backup
- Upload Huge Files
- Live Streaming
- Presence Indicators
- Screen sharing
- Voice Broadcasting
- File and Media Sharing
- Rich Media Support
- Profanity Filters
- Chat Moderation Tools
- Integration with Other Services
- Call Export
Why MirrorFly Self-Hosted Video ChatSolution?
There are a thousand reasons I could give to back the fact that MirrorFly is the best video chat solution provider for business & enterprise apps.
Here’s a glimpse:
- Fully Customizable
- Data Ownership
- Hire Dedicated Team
- Custom Security
- Flexible Hosting (On-premise/ On-cloud)
- Whitelabel Solution
- SIP/VoIP Solution
- WebRTC Calls
- Profanity filter
- Full Source Code Ownership
- Unlimited Chat & Call
- Chatbot
- ChatGPT support
Isn’t that cool?
Now, your customers will also love to have chat features, and if you want to add instant messaging to your app, check out this article on How to build a chat app.
Want to explore more about embedding video call solutions? Contact the team and discuss your project right away!
Add Video Conferencing To Your Website & Apps
Get 1000+ messaging features along with video and voice calling, into any app with end-to-end encryption.
Contact Sales Complete Ownership
-
On-Premise Hosting
-
Multi-tenancy Support

Further Reading
- What is a Video SDK? – An Ultimate Guide [2026]
- 10 Best Video Calling APIs and Conferencing SDKs in 2026
- Build Video Chat App using Node.js + WebRTC
- Build vs Buy: A Guide To Developers On Video and WebRTC
- Live Video Call: How Can It Benefit Your Business In 2026?
This guy is a blogging freak. He craves to blend the finest words to deliver meaningful, informative content in the most engaging way. This dude loves to craft content on tech blogs with a thorough piece of information. When he’s not writing, researching, or editing, you can catch him riding into unknown terrains and scribbling quotes.
Hi there! I’m currently interested only in the Chat/Group Chat features to embed into a website for our community to enjoy chatting with each other.
I want to embed group video call into my website,Can you please give me quote chart please? I would like to know the following; 1. Can I subscribe and use the SDK/API to charge my customers for embedded live video chat on their site or is there a limitation based on domain? I am basically trying to set up a white label solution 2. Is a Monthly active user, simply any user that engage in the chat?
I am seeking a video call solution that has Browser SDK and API to embed into my website to conduct the video conferencing between customers and our staff.